A broken showerhead leaking even 10 drips per minute can waste over 500 gallons of water each year! That's enough to wash 60 loads of dishes in your dishwasher. This startling statistic highlights the impact of even a small drip on your utility bill and the environment.
The good news is that there is simple, yet effective ways to solve this niggling problem. In this guide, we'll show you how to fix a leaky shower head, transforming a small but significant household problem into a win for water conservation.
Are you ready to make a big impact with a few small fixes?
Let's walk through some common signs and causes to help you pinpoint the cause of a leak in your shower.
Have you noticed your shower head dripping? It could be due to limescale buildup, a worn-out rubber washer, or damaged seals. Whatever the cause, this should be attended to as soon as possible.
If you've got damaged P-traps or drains that weren't installed quite right, that could be your culprit. Checking the P-trap for damage and ensuring everything's installed correctly are great first steps.
These leaks can be a bit tricky. Keep an eye out for wet patches, damaged wallpaper, or eroding plaster, as they could point to leaks in the water supply pipes. This is a bit more complex, so calling in a professional might be your best bet.
Sometimes, the issue lies in the shower area itself. This could mean broken waste pipes, damaged connections, or even cracked shower floors. These problems often need a professional's touch for assessment and repair.
Tackling shower leaks early can save you from water damage and more serious structural problems. If you're unsure about the cause or how to fix it, it's always wise to consult a professional plumber. (That's us!)
If your problem lies with the shower head, then read on to find your solution.
Roll up your sleeves and get ready to tackle that leaky shower head with a well-stocked DIY arsenal. Here's what you'll need:
An adjustable wrench for loosening and tightening
Plumber's tape to prevent future leaks at the connection points
Replacement Washers and O-rings for renewing worn-out parts
A new shower head if necessary
Vinegar for cleaning mineral deposits
A bucket and cloth for catching drips and cleaning up
A screwdriver in case things need a little twist
A flashlight
Teflon or waterproof grease to help lubricate parts during reassembly
Penetrating oil for those really stubborn fixtures.
With these tools at your disposal, you'll not only fix the leak but also understand your shower head better than ever. Let's get to work!
The journey to fixing a leaky shower head is easier than it sounds. With the right tools and a bit of help from your friendly neighborhood plumbers, you'll turn that drip into a DIY victory. And, of course, you'll save yourself a tidy sum of money at the same time.
To avoid an unplanned shower, locate the water supply valve and turn it off. This is usually found in the bathroom or basement and will prevent a watery mess when starting your fix. Keep a bucket handy to catch the residual water in the pipes.
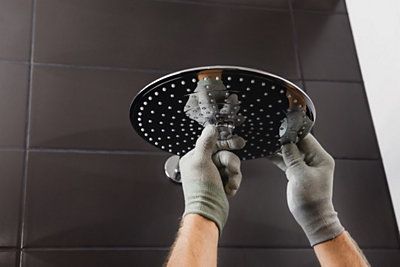
Use your adjustable wrench to unscrew the shower head from the pipe gently. It's a good idea to wrap a cloth around the connection to protect it from scratches. Remember, "lefty loosey" (or anticlockwise for us pros) to get the shower head off.
Check the shower head for any signs of mineral buildup or corrosion, which are common causes of leakage. If you notice white, chalky deposits, that's your clue. To tackle this, soak the clogged shower head in a vinegar solution for a few hours.
This natural cleaner works wonders in breaking down minerals. After soaking, gently scrub the nozzles and any crevices with a soft brush to remove leftover deposits, ensuring thorough cleanliness. This step not only helps stop leaks but also improves water flow.
Inspect the washers and O-rings within the shower head for any signs of wear, such as cracking or brittleness. These small parts are crucial for creating a tight seal and preventing leaks.
If you find any damage, replace them with new ones that match the exact size and shape. This ensures a proper fit and avoids further leakage. Remember, using correctly sized washers and O-rings is key to maintaining the integrity of your shower head's function.
Plumber's tape, also known as thread tape, is a key part of any plumbing project as it helps to create a watertight seal.
Firstly, prepare the threads by ensuring they are free from old sealant or other debris. Dry them thoroughly before applying the new tape.
Start the end of the tape on the pipe's second thread. Hold the roll of tape in your dominant hand and the pipe you're wrapping in the other. Find the second thread from the end of the pipe and line it up with the end of your tape. Pull the tape tight and wrap it in the same direction as the threads.
Ensure the tape is applied smoothly and evenly.
Once everything is cleaned and replaced, it's time to reattach the shower head. Start by hand-tightening it onto the arm to ensure proper alignment and prevent cross-threading.
Then, use a wrench for a final snug fit, but be cautious not to overtighten as this could damage the threads or the shower head itself. After reassembling, turn the water supply back on and observe the shower head while it is running.
Check for any leaks around the connection. If there's still a drip, you might need to readjust or reapply plumber's tape for a better seal.
Sometimes, replacing the shower head is more practical than attempting another repair. This is especially true if the shower head is:
Persistently leaking after multiple repairs
Heavily corroded
An outdated model that doesn't meet modern water efficiency standards
When selecting a new shower head, consider models with water-saving features, such as low-flow technology, which can significantly reduce water usage while maintaining good water pressure.
Additionally, ensure the new shower head is compatible with your existing plumbing for easy installation. Upgrading your shower head can also offer enhanced features like multiple spray settings or advanced filtration systems.
Regular maintenance and a sharp eye are your shower head's best friends.
Firstly, stay alert for any signs of mineral buildup or wear and tear. This routine inspection is all about spotting the early signs of trouble. For example, look for any unusual water spray patterns or drips. These often indicate a buildup of minerals or a failing washer.
In hard water areas, mineral build-up may be an ongoing battle for you. Whether you use a vinegar solution to keep the water flowing or opt for a commercial descaler, this is a continuous process. Where possible, try to avoid harsh chemicals - it's better for your home and the environment.
Don't forget to inspect and replace washers and O-rings periodically - they're small but mighty in preventing leaks. Look out for splits, cuts, or blisters, signs of a tired seal.
A bit of preventative care and a watchful eye can ensure your showers remain blissfully uninterrupted. But if you're ever in doubt or facing a plumbing conundrum, Parker & Sons are always ready to lend a helping hand.
Now that you know how to fix a leaky shower head, you can dive right in. Make sure that you know where the leak is coming from, collect the right tools, and follow our step-by-step guide on fixing that costly leak.
We're behind you all the way, but we also know that some of you are not necessarily the "roll up your sleeves" type. If you'd rather spend your Saturday doing your favorite hobby than with a delinquent showerhead, then give Parker & Sons a call.
You can rest easy knowing that you're dealing with an award-winning company in Arizona and your call will always be answered by a real, live person. So, if you need a little help - or a lot - give us a call.
Stay up-to-date on current news, promotions, and industry tips.